Delta Faucet Still Leaks After Replacing Cartridge? Here’s Why
Replacing a cartridge is often the go-to solution when a Delta faucet still leaks after replacing the cartridge. However, it can be frustrating when the dripping persists even after this seemingly simple fix. This article delves into the common reasons why your Delta faucet still leaks after replacing the cartridge, offering a comprehensive guide to troubleshooting and resolving the issue. We’ll explore potential causes, from mineral buildup to installation errors, and provide step-by-step solutions to help you stop that annoying drip and save water. Understanding why a Delta faucet still leaks after replacing the cartridge is crucial for effective repair and preventing future problems.
Understanding the Problem: Why the Leak Persists
Before diving into solutions, it’s important to understand why a new cartridge might not solve the problem. A Delta faucet still leaks after replacing the cartridge for several reasons, and identifying the root cause is key to a successful repair. Here are some of the most common culprits:
- Mineral Buildup: Hard water can lead to mineral deposits accumulating around the faucet seat and cartridge. These deposits can create an uneven surface, preventing the new cartridge from sealing properly.
- Damaged Faucet Seat: The faucet seat is the part of the faucet that the cartridge seals against. If the seat is corroded, scratched, or otherwise damaged, it won’t provide a proper sealing surface.
- Improper Installation: Even a slight misalignment during installation can cause a new cartridge to fail. The cartridge must be fully seated and properly aligned for it to function correctly.
- Defective Cartridge: Although rare, it’s possible that the replacement cartridge itself is defective. Manufacturing flaws can sometimes lead to leaks, even in new parts.
- Worn O-Rings and Seals: Besides the main cartridge, other O-rings and seals within the faucet assembly can wear out and cause leaks.
- High Water Pressure: Excessively high water pressure can put strain on the faucet components, leading to leaks.
Troubleshooting Steps: Identifying the Source of the Leak
To pinpoint the cause of your leaking Delta faucet, follow these troubleshooting steps:
Inspect the Faucet Seat
The faucet seat is a critical component in preventing leaks. Here’s how to inspect it:
- Turn off the Water Supply: Before working on any plumbing fixture, always shut off the water supply to prevent flooding.
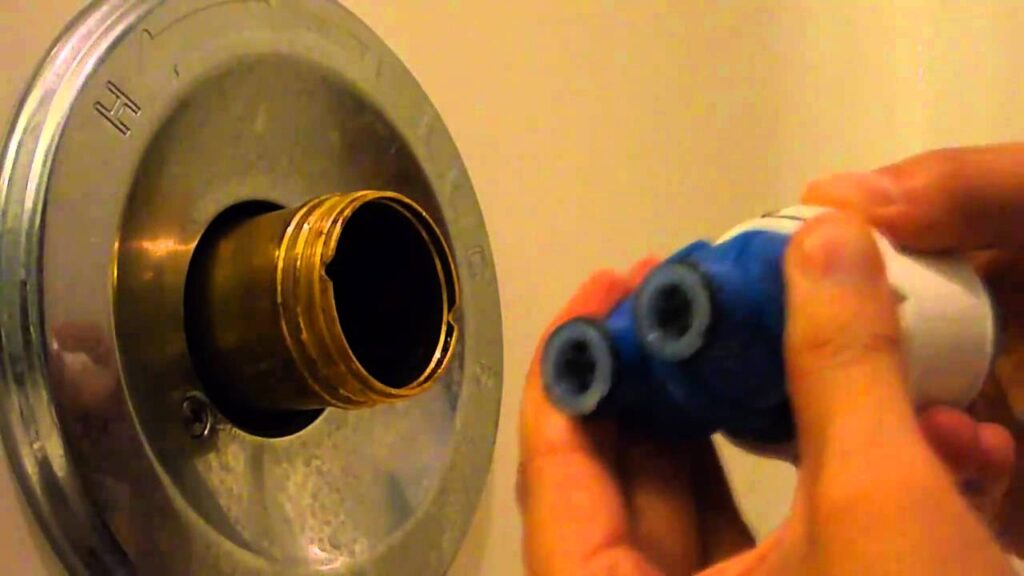
- Remove the Cartridge: Follow the manufacturer’s instructions to remove the newly installed cartridge.
- Inspect the Seat: Examine the faucet seat for any signs of corrosion, scratches, or damage. Use a flashlight to get a better view.
- Clean the Seat: If you find mineral buildup, gently clean the seat with a non-abrasive cleaner and a soft cloth. You can also use a vinegar solution to dissolve mineral deposits.
- Replace the Seat (If Necessary): If the seat is severely damaged, you’ll need to replace it. Contact Delta or a local plumbing supply store to find a replacement seat that is compatible with your faucet model.
Check for Mineral Buildup
Mineral buildup can interfere with the cartridge’s ability to seal properly. Here’s how to check for and remove mineral deposits:
- Inspect the Cartridge Housing: Examine the area where the cartridge sits inside the faucet body. Look for any signs of mineral buildup or corrosion.
- Clean the Housing: Use a small brush or a cotton swab to clean the cartridge housing. A vinegar solution can help dissolve mineral deposits.
- Rinse Thoroughly: After cleaning, rinse the housing thoroughly with water to remove any remaining cleaner or debris.
Verify Proper Installation
Improper installation is a common reason why a Delta faucet still leaks after replacing the cartridge. Follow these steps to ensure the cartridge is installed correctly:
- Refer to the Manufacturer’s Instructions: Always follow the manufacturer’s instructions for installing the cartridge. These instructions provide specific guidance for your faucet model.
- Align the Cartridge Properly: Ensure that the cartridge is properly aligned with the faucet body. Most cartridges have alignment marks or notches that need to be aligned correctly.
- Seat the Cartridge Fully: Make sure the cartridge is fully seated in the faucet body. It should fit snugly and securely.
- Tighten the Retaining Nut: Tighten the retaining nut or screw that holds the cartridge in place. Be careful not to overtighten, as this can damage the cartridge or the faucet body.
Inspect Other O-Rings and Seals
Besides the main cartridge, other O-rings and seals within the faucet assembly can wear out and cause leaks. Here’s how to inspect them:
- Identify Other Seals: Refer to the faucet’s parts diagram to identify all the O-rings and seals in the assembly.
- Inspect for Wear and Tear: Examine each O-ring and seal for signs of wear, cracks, or damage.
- Replace Worn Seals: Replace any worn or damaged O-rings and seals with new ones. Make sure to use the correct size and type of seals for your faucet model.
Solutions: Fixing the Leaking Faucet
Once you’ve identified the cause of the leak, you can take steps to fix it. Here are some common solutions for a Delta faucet still leaks after replacing the cartridge:
Cleaning or Replacing the Faucet Seat
If the faucet seat is corroded or damaged, cleaning or replacing it may solve the problem. Follow these steps:
- Clean the Seat: Use a non-abrasive cleaner and a soft cloth to clean the seat. A vinegar solution can help dissolve mineral deposits.
- Replace the Seat: If cleaning doesn’t work, replace the seat with a new one. Contact Delta or a local plumbing supply store to find a replacement seat that is compatible with your faucet model.
Removing Mineral Buildup
Removing mineral buildup can improve the cartridge’s ability to seal properly. Follow these steps:
- Use a Vinegar Solution: Soak the affected parts in a vinegar solution for several hours or overnight to dissolve mineral deposits.
- Scrub Gently: Use a small brush or a cotton swab to scrub away any remaining mineral deposits.
- Rinse Thoroughly: Rinse the parts thoroughly with water to remove any remaining cleaner or debris.
Ensuring Proper Cartridge Installation
Proper installation is crucial for preventing leaks. Follow these steps to ensure the cartridge is installed correctly:
- Refer to the Manufacturer’s Instructions: Always follow the manufacturer’s instructions for installing the cartridge.
- Align the Cartridge Properly: Ensure that the cartridge is properly aligned with the faucet body.
- Seat the Cartridge Fully: Make sure the cartridge is fully seated in the faucet body.
- Tighten the Retaining Nut: Tighten the retaining nut or screw that holds the cartridge in place. Be careful not to overtighten.
Replacing Worn O-Rings and Seals
Replacing worn O-rings and seals can stop leaks caused by damaged seals. Follow these steps:
- Identify Worn Seals: Refer to the faucet’s parts diagram to identify all the O-rings and seals in the assembly.
- Replace Worn Seals: Replace any worn or damaged O-rings and seals with new ones. Make sure to use the correct size and type of seals for your faucet model.
Checking and Adjusting Water Pressure
High water pressure can put strain on the faucet components, leading to leaks. Here’s how to check and adjust your water pressure:
- Check Water Pressure: Use a water pressure gauge to check your home’s water pressure. The ideal water pressure is between 40 and 60 PSI.
- Adjust Water Pressure: If your water pressure is too high, install a pressure regulator to reduce it to the recommended level.
When to Call a Plumber
While many faucet leaks can be resolved with DIY solutions, some situations may require the expertise of a professional plumber. Consider calling a plumber if:
- You’re uncomfortable working with plumbing fixtures.
- You’ve tried the troubleshooting steps and the leak persists.
- You suspect a more serious plumbing issue, such as a damaged pipe or a faulty water supply valve.
Preventing Future Leaks
Preventing future leaks can save you time, money, and frustration. Here are some tips for maintaining your Delta faucet:
- Regular Cleaning: Clean your faucet regularly to remove mineral buildup and prevent corrosion.
- Proper Installation: Ensure that all faucet components are properly installed and tightened.
- Monitor Water Pressure: Check your water pressure regularly and adjust it if necessary.
- Address Leaks Promptly: Address any leaks promptly to prevent further damage and water waste.
A Delta faucet still leaks after replacing the cartridge can be a frustrating issue, but with careful troubleshooting and the right solutions, you can often resolve the problem yourself. By identifying the cause of the leak and following the steps outlined in this article, you can stop the dripping and restore your faucet to proper working order. Remember to always turn off the water supply before working on any plumbing fixture, and consult a professional plumber if you’re unsure about any aspect of the repair. [See also: How to Choose the Right Faucet Cartridge] [See also: Common Faucet Problems and Solutions] [See also: Delta Faucet Repair Guide]
