The Art of Perspective in Landscape Photography: Capturing Depth and Dimension
Landscape photography, at its core, is about capturing the grandeur and beauty of the natural world. But simply pointing a camera at a scenic vista rarely translates into a compelling photograph. One of the key elements that elevates a landscape image from ordinary to extraordinary is perspective. Understanding and utilizing perspective allows photographers to create a sense of depth, dimension, and realism, drawing viewers into the scene and making them feel as though they are standing right there. This article delves into the art of perspective in landscape photography, exploring different techniques and strategies to help you master this crucial aspect of visual storytelling.
Understanding Perspective in Landscape Photography
Perspective, in its simplest form, refers to the way objects appear to the eye based on their spatial attributes and their dimensions, or their position relative to the viewer. In photography, manipulating perspective involves using various techniques to create the illusion of depth on a two-dimensional surface. This is achieved by playing with the relative size, position, and convergence of objects within the frame. A strong understanding of perspective is fundamental to creating captivating landscape photographs.
Linear Perspective
Linear perspective is perhaps the most well-known type of perspective. It relies on the principle that parallel lines appear to converge as they recede into the distance, meeting at a vanishing point on the horizon. Roads, railway tracks, and rows of trees are classic examples of elements that can be used to create strong linear perspective in landscape photos. By positioning your camera strategically, you can emphasize the converging lines and draw the viewer’s eye deep into the scene. [See also: Leading Lines in Photography Composition]
Atmospheric Perspective
Atmospheric perspective, also known as aerial perspective, is based on the observation that objects further away from the viewer appear less distinct, with reduced contrast and color saturation. This is due to the scattering of light by particles in the atmosphere. By incorporating elements like mist, fog, or haze into your landscape photos, you can effectively create a sense of depth and distance. The subtle gradations in tone and color help to separate the different planes of the scene, enhancing the overall sense of perspective.
Size and Scale
Using size and scale effectively is another powerful way to manipulate perspective. By including objects of known size in your landscape composition, such as trees, buildings, or even human figures, you can provide a sense of scale and help the viewer understand the vastness of the scene. Placing a small figure in the foreground of a sweeping landscape, for example, can dramatically emphasize the scale of the mountains or valleys in the background. This is a simple yet effective way to create a more immersive and impactful image. The careful use of size and scale is key to successfully conveying perspective.
Techniques for Enhancing Perspective in Landscape Photography
Now that we’ve explored the different types of perspective, let’s delve into some practical techniques you can use to enhance perspective in your landscape photography.
Choosing the Right Lens
The lens you choose can significantly impact the perspective of your landscape photos. Wide-angle lenses (e.g., 16-35mm) tend to exaggerate perspective, making foreground objects appear larger and background objects appear smaller and farther away. This can be useful for creating a sense of drama and emphasizing the vastness of a scene. Telephoto lenses (e.g., 70-200mm or longer), on the other hand, compress perspective, making objects appear closer together. This can be useful for isolating specific elements in the landscape and creating a more intimate feel. Experimenting with different lenses is crucial to finding the right perspective for your vision.
Camera Height and Angle
The height and angle at which you position your camera can also dramatically affect perspective. Shooting from a low angle can emphasize the height of foreground objects and create a more dramatic sense of depth. Shooting from a high angle, on the other hand, can compress the scene and provide a broader overview. Experiment with different camera positions to see how they impact the perspective of your landscape photos. Consider using a tripod to ensure stability and sharpness, especially when shooting at low shutter speeds.
Leading Lines
Leading lines are visual elements that guide the viewer’s eye through the landscape and into the distance. These can be anything from roads and rivers to fences and rows of trees. By strategically incorporating leading lines into your composition, you can create a strong sense of depth and draw the viewer into the scene. Leading lines are a powerful tool for enhancing perspective and creating a more engaging image. [See also: Composition Tips for Landscape Photography]
Foreground Interest
Including interesting foreground elements in your landscape photos can help to create a sense of depth and scale. These elements can be anything from rocks and flowers to logs and puddles. By placing these elements close to the camera, you can create a strong sense of foreground interest and draw the viewer’s eye into the scene. Make sure that your foreground elements are sharp and well-defined to maximize their impact. The inclusion of foreground interest enhances the overall perspective and composition.
Depth of Field
Depth of field refers to the area of the image that appears sharp. By using a wide aperture (e.g., f/2.8 or f/4), you can create a shallow depth of field, blurring the background and isolating your subject. This can be useful for drawing attention to a specific element in the landscape. Conversely, by using a narrow aperture (e.g., f/8 or f/11), you can create a deep depth of field, ensuring that everything from the foreground to the background is sharp. This is often preferred for landscape photography, as it allows you to capture the entire scene in sharp detail. Understanding how to control depth of field is essential for manipulating perspective and creating the desired effect.
Examples of Perspective in Landscape Photography
To further illustrate the principles of perspective, let’s look at some examples of how it can be used in landscape photography:
- Grand Canyon: A wide-angle lens, shot from a low angle, can emphasize the vastness and depth of the Grand Canyon. Including a small figure in the foreground can further enhance the sense of scale.
- Mountain Range: A telephoto lens can compress the perspective of a mountain range, bringing the peaks closer together and creating a sense of intimacy.
- Coastal Scene: Leading lines, such as a winding path or a rocky shoreline, can draw the viewer’s eye into the scene and create a sense of depth along the coast.
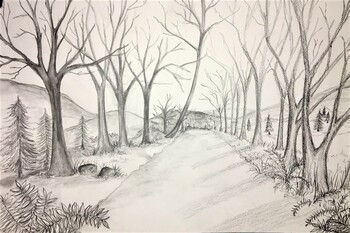
- Forest: Atmospheric perspective can be used to create a sense of mystery and depth in a forest scene. The mist or fog that often hangs in the air can help to separate the different planes of the forest, enhancing the overall sense of perspective.
Conclusion
Mastering perspective is essential for creating compelling and impactful landscape photographs. By understanding the different types of perspective and applying the techniques discussed in this article, you can transform ordinary scenes into extraordinary images that capture the beauty and grandeur of the natural world. Remember to experiment with different lenses, camera angles, and compositional elements to find the perspective that best suits your vision. With practice and patience, you can unlock the power of perspective and elevate your landscape photography to new heights. The careful consideration of perspective will undoubtedly improve your landscape photography skills.
